Example Workflow - Request Time Off
Use the following steps to create a simple workflow that a user can execute to Request Time Off. This workflow will then be used by the Time Off entitlement.
Follow steps 1 through 6 of the General Steps for creating a Rapididentity Workflow.
Name the workflow
Request Time Offand provide a short description. Mark the workflow as Active.Click the vertical line connecting the Start Action to the End Action and select the green + sign.
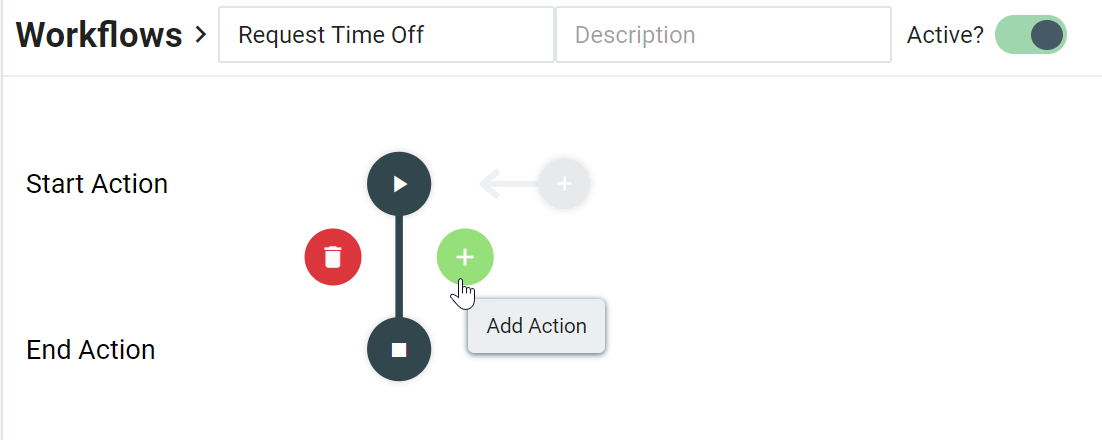
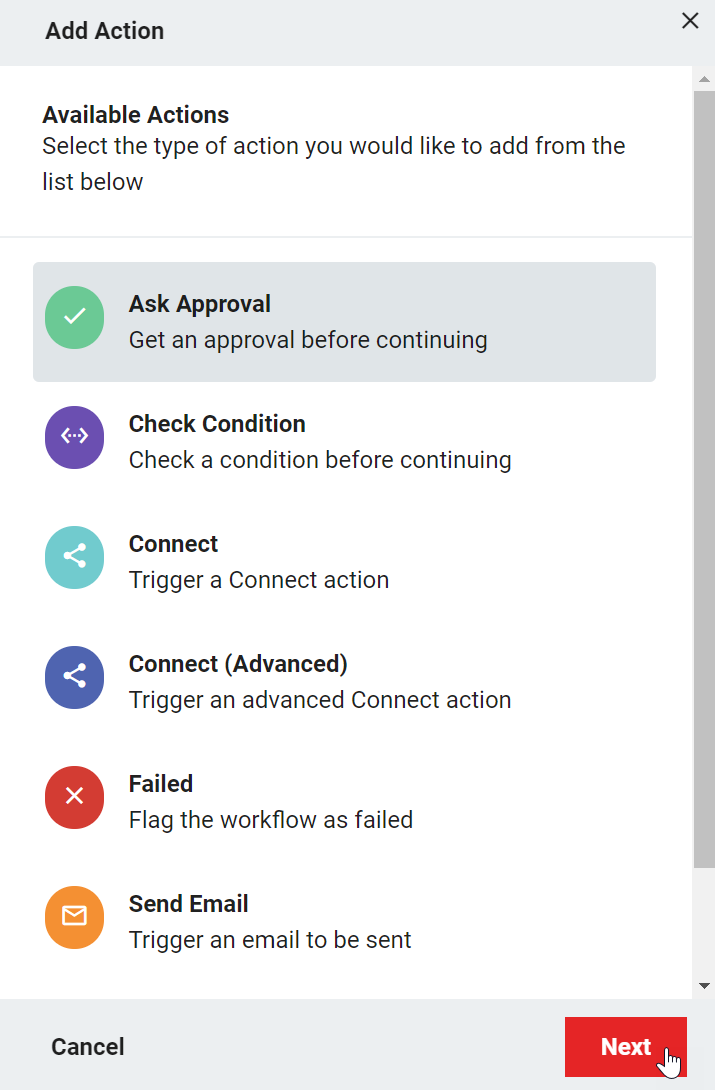
Select Ask Approval and click Next.
Enter Ask Approval in the Name input area.

Begin typing your userID in the Approver input area and select your account when it is displayed.
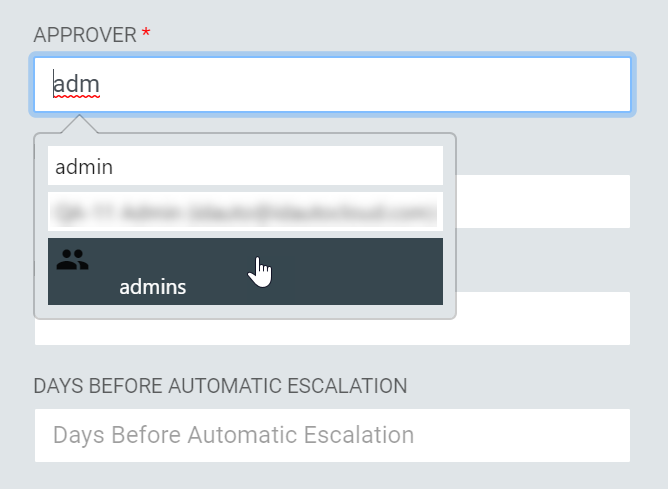
Click Create.
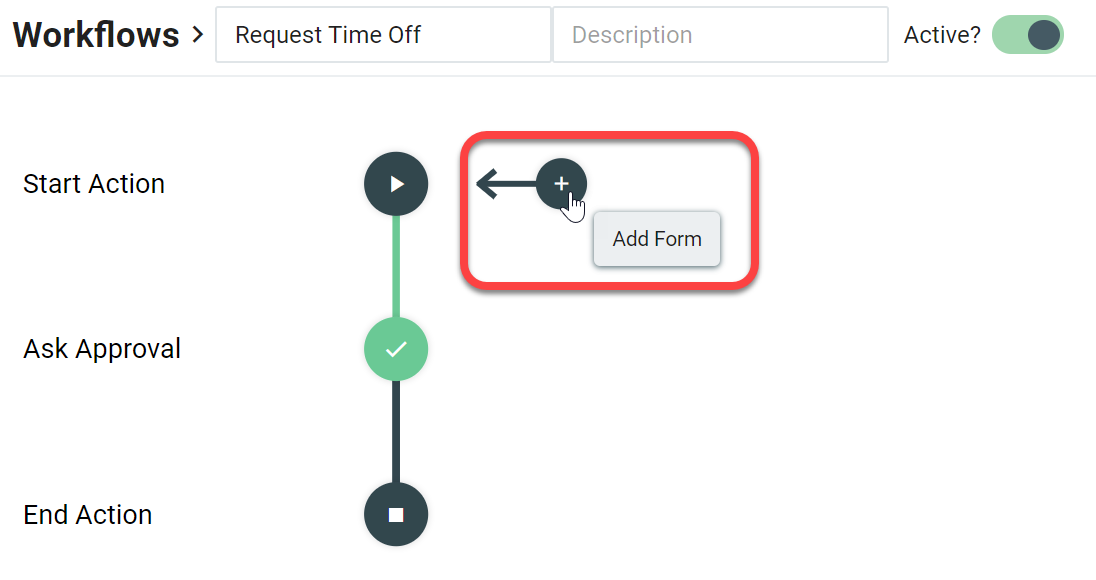
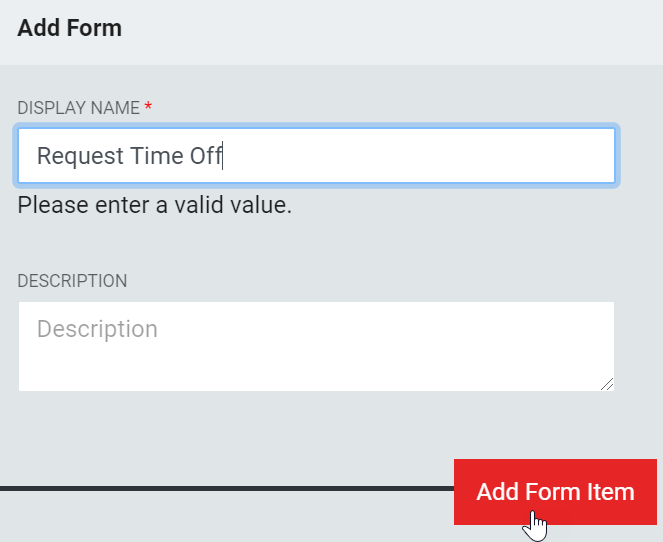
Select Add Form (+) to capture the requested date.
Use Request Time Off for the Display Name and select Add Form Item.
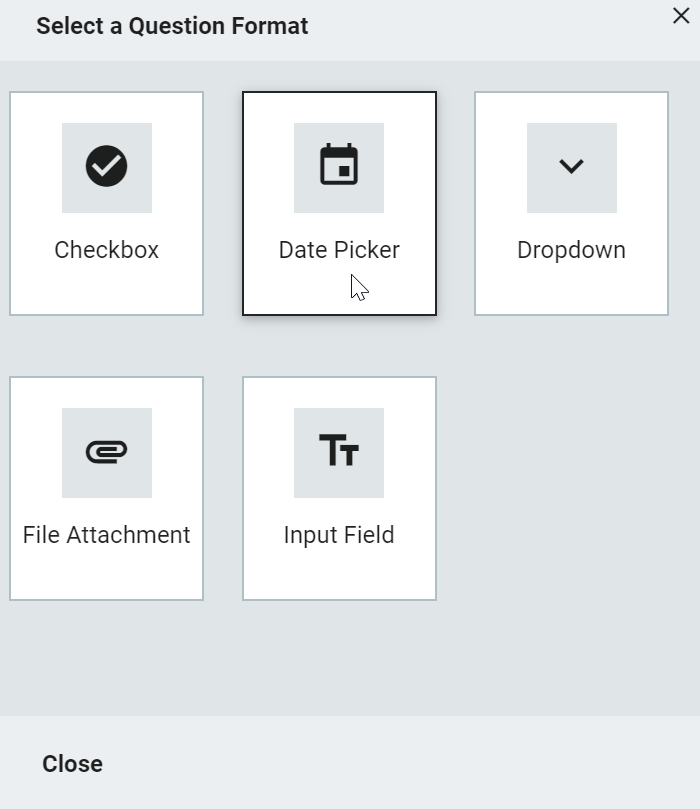
Choose Date Picker.
In the Details tab, enter
Datein the Display Name input area (required), and enter1in the ID input area (required). Provide a short description (optional).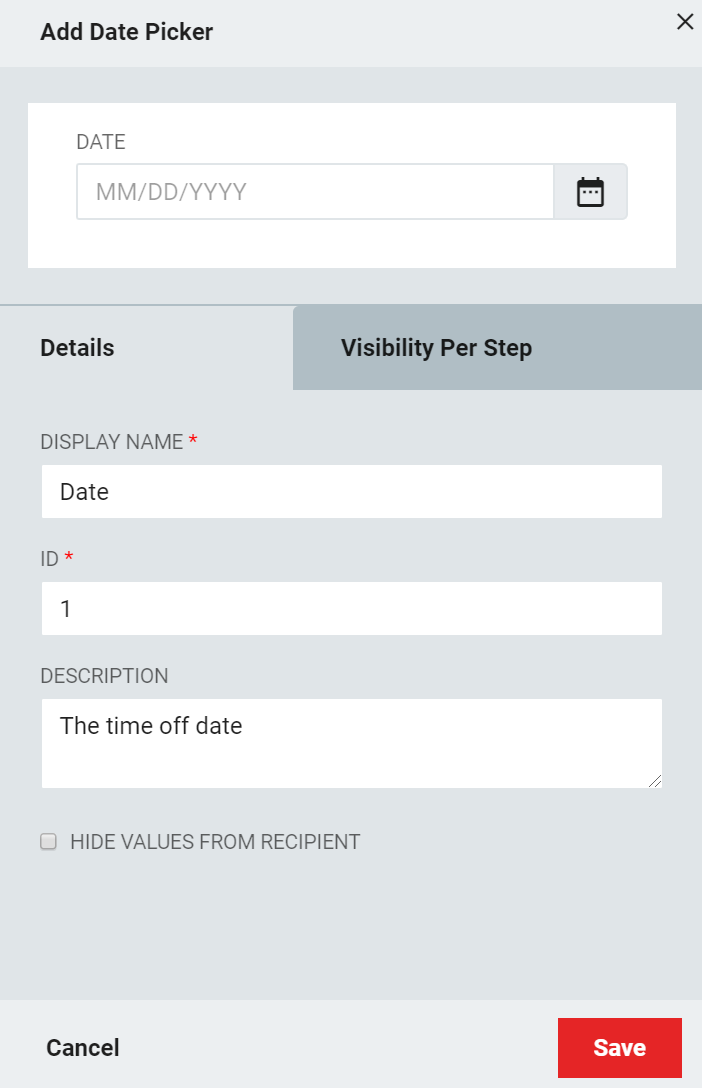
In the Visibility Per Step tab:
Select
Editablein the Start Action dropdown.Select
Requiredin the Ask Approval dropdown.Click Save to save the Date Picker field.

Click Save again to save the Request Time Off form.
Click Save again to save the Request Time Off workflow.