SAML SSO / ECP Settings and Attribute Mapping
The SAML authentication process typically begins when the Identity Provider receives an Authentication Request <AuthnRequest> generated by a SAML Service Provider and conveyed by the authenticating user's web browser. The <AuthnRequest> often indicates where the IdP is to send the SAML Response/Assertion after the authentication completes successfully. Under normal circumstances, the IdP will only honor that requested URL if it is defined as a valid "Assertion Consumer Service" in the Relying Party metadata.
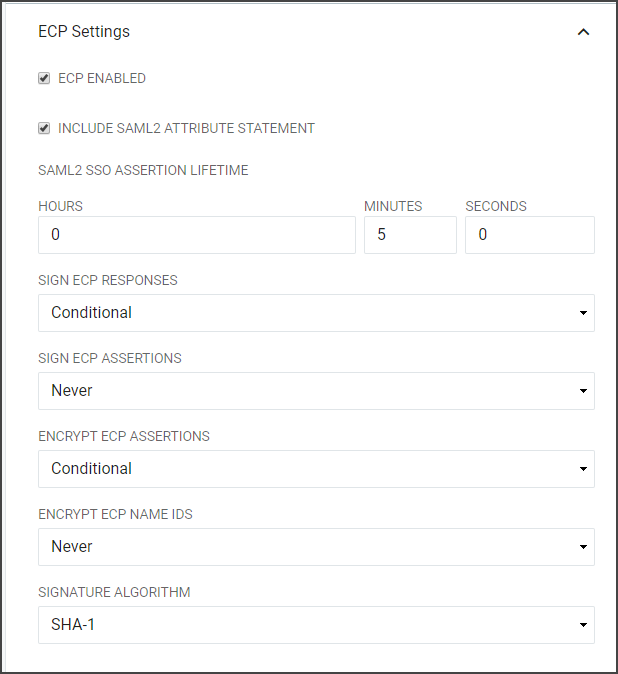
RapidIdentity Federation supports the Oasis SAML V2.0 Enhanced Client or Proxy (ECP) profile. RapidIdentity supports ECP and can be enabled if required by a particular Federation Partner which may require SAML ECP to authenticate and their ECP Advanced Settings, such as Microsoft Office 365™.
The SAML SSO and ECP Advanced Settings are both configured utilizing similar Federation Partners SSO Settings Menu options, therefore, the configuration options are combined below in the SAML SSO / ECP Advanced Settings Table.
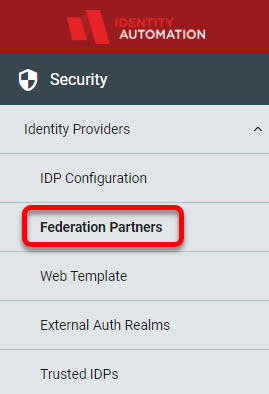
Access the SAML SSO Advanced Settings from the Configuration menu and select Federation Partners from the left hand menu items.
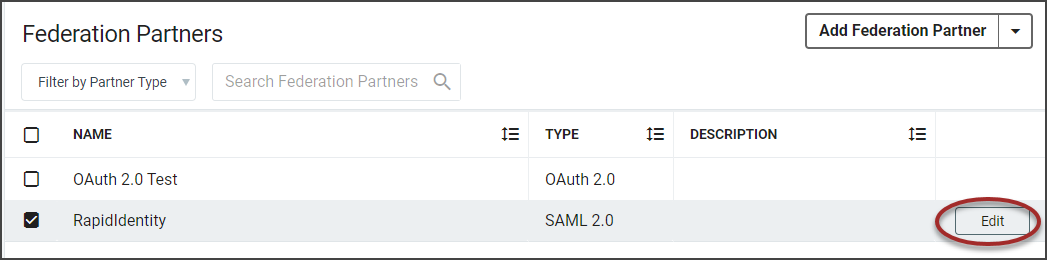
If there are Federation Partners that have been configured, they will display in the workspace. Hover in the far right of the row and click the Edit button.
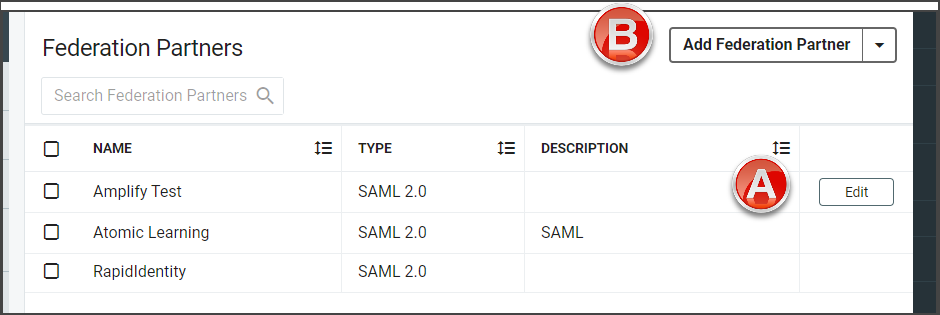
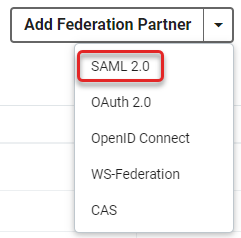
If there are no Federation Partners already configured, click Add Federation Partner and select SAML 2.0 from the drop-down to open the configuration settings.
The Community Federation Partners workspace will load. Refer to the Community section to learn more about that topic.
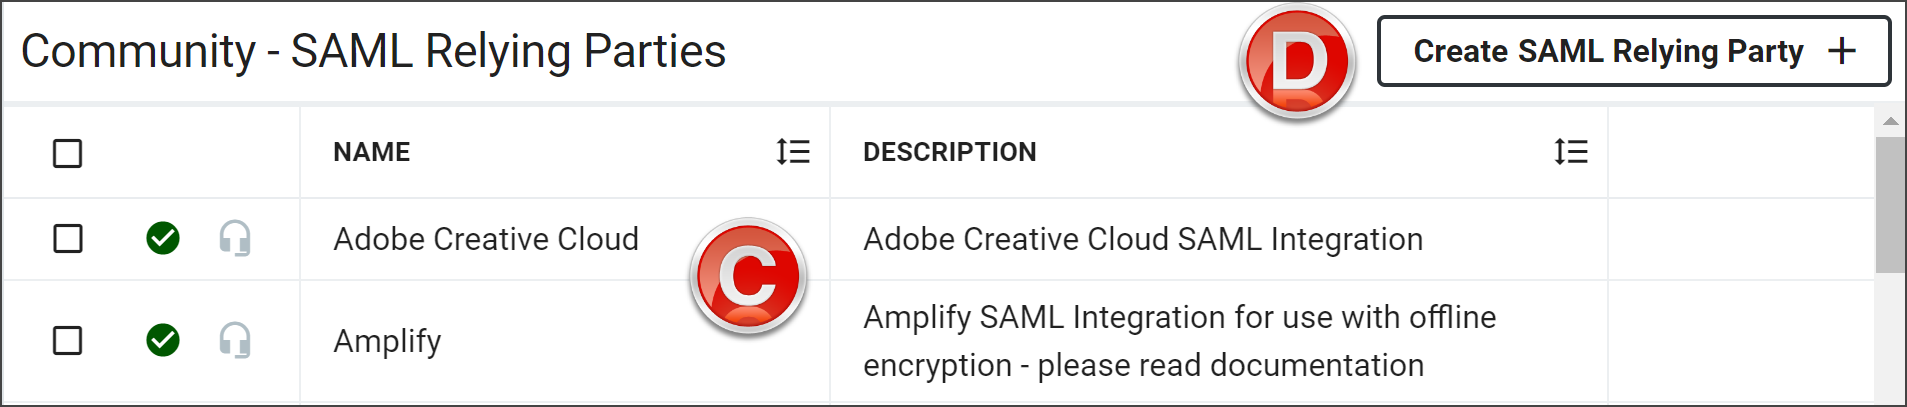
Click Create SAML Relying Party to open the configuration options.
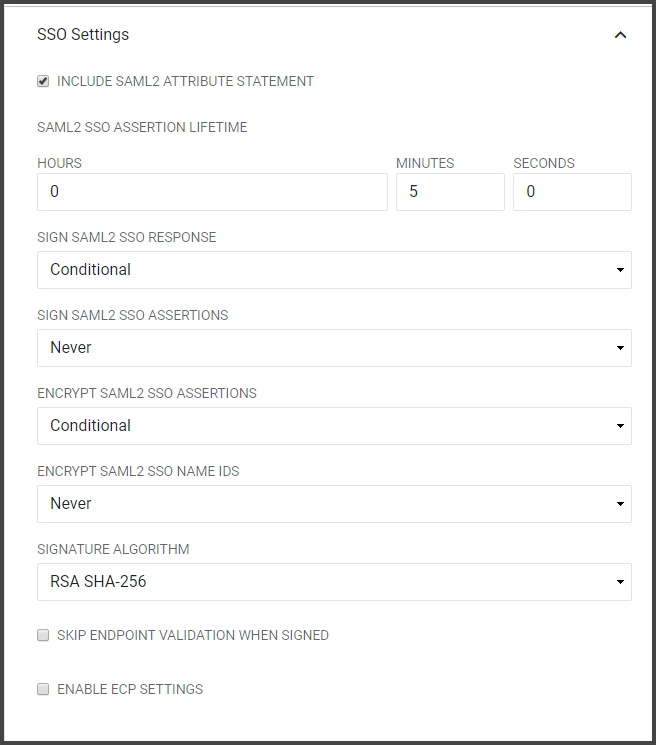
From the Federation Partners configuration screen, click on SSO Settings.
Note
By default, the ECP Settings are not active. Click Enable ECP Settings to enable ECP Settings. When selecting the Enable ECP Settings checkbox, the ECP Settings section will become available beneath the SSO Settings along with the configuration options.
 |
When selecting the Enable ECP Settings checkbox, the ECP Settings section will become available beneath the SSO Settings along with the configuration options.
 |
Field | Description |
|---|---|
Include SAML2 Attribute Statement | If selected the SAML2 SSO or ECP Assertion generated for this Relying Party will contain an <AttributeStatement> element. |
SAML2 SSO Assertion Lifetime | Defines the period of time that a SAML2 SSO Assertion generated for this Relying Party will be valid in hours, minutes, and seconds. This setting directly affects the "NotOnOrAfter" attribute in the SAML Assertion which indicates to the Relying Party who receives the Assertion that the Assertion should only be considered valid if it is received before this time instant. |
Sign SAML2 SSO or ECP Responses | Determines if the SAML2 SSO or ECP Responses should be cryptographically signed. Choose "Always" to enable signatures on the Response and "Never" to disable signatures on the Response. |
Sign SAML2 SSO or ECP Assertions | Determines if the SAML2 SSO or ECP Assertions should be cryptographically signed. Choose "Always" to enable signatures on the Response and "Never" to disable signatures on the Response. |
Encrypt SAML2 SSO or ECP Assertions | Determines if the SAML2 SSO or ECP Assertions should be encrypted. Note: this is only possible if the IdP is provided with an "encryption" certificate in the SAML metadata for the Relying Party. Choose "Always" to enable encryption and "Never" to disable encryption. |
Encrypt SAML2 SSO or ECP Name IDs | Determines if the Name IDs present in the SAML2 SSO Assertions should be encrypted. Note: this is only possible if the IdP is provided with an "encryption" certificate in the SAML metadata for the Relying Party. Choose "Always" to enable encryption and "Never" to disable encryption. |
Signature Algorithm | The algorithm to use when cryptographically signing the SAML2 SSO or ECP Responses and/or SAML2 SSO or ECP Assertions. SHA-1: Use only when the Relying Party does not support SHA-256. SHA-256: In general, "SHA-256" should be chosen unless the Relying Party does not support it. |
Skip Endpoint Validation When Signed | If the <AuthnRequest> is cryptographically signed and if the IdP can successfully verify that signature by using a public signing key present in the Relying Party's metadata, then the IdP can be instructed to comply with an un-recognized Assertion Consumer Service URL by enabling this option. |
Note
After a user authenticates successfully, a SAML Assertion is generated by the IdP. The SAML Assertion contains attributes about the user (e.g. name, email address, etc) and other information describing how and when authentication occurred at the IdP. The SAML Assertion is then embedded inside of a more consolidated generic SAML Response and it is the SAML Response, containing the Assertion, which is ultimately conveyed to the Relying Party.
Attribute Mapping
The SAML Attributes available for assignment will have been set up already under the Federation Partners SAML Attributes section.
Select the Federation Partner from the Federation Partners workspace, and click Edit by hovering in the last column.
From the Federation Partners window, scroll down to Attribute Mapping.
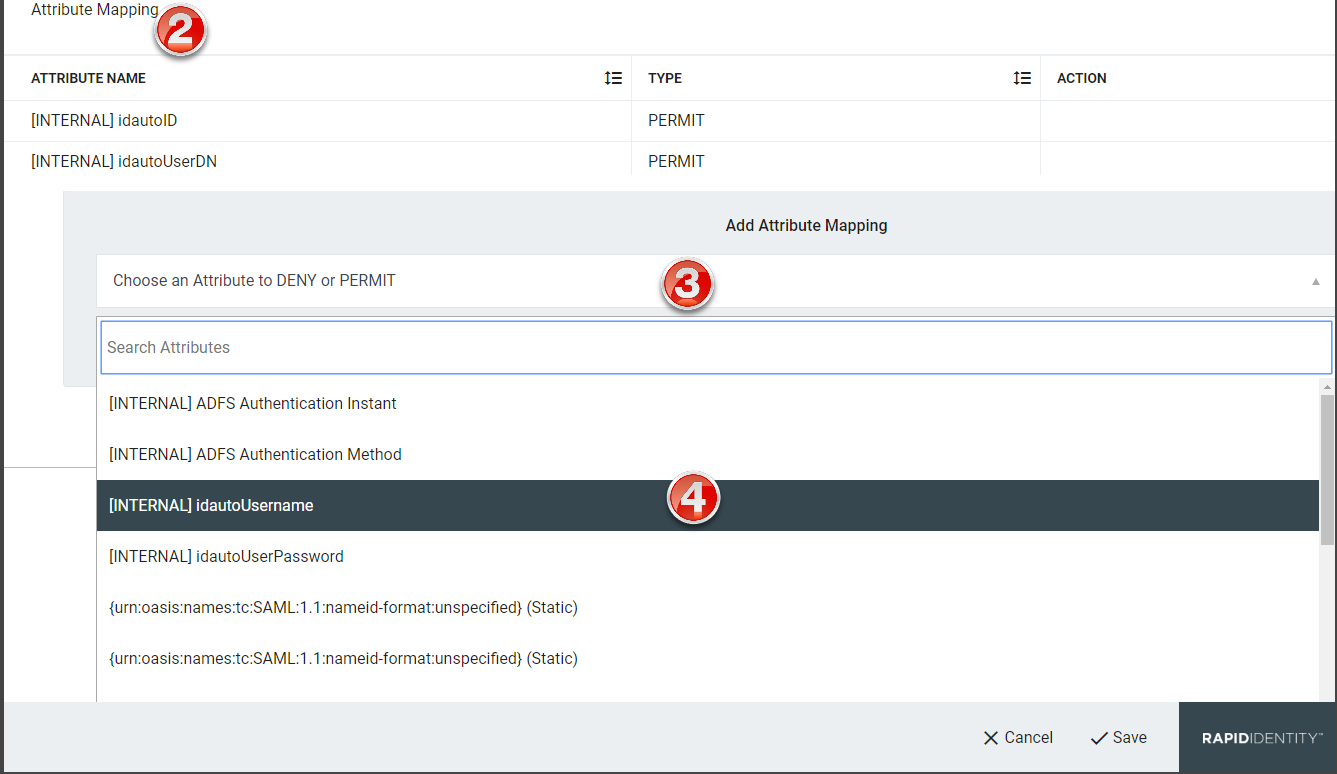
Click Choose and Attribute to DENY or PERMIT.
Click to expand the drop-down of available attributes to deny or permit mapping.
The Add New Attribute window will load. Select the attribute type from the drop-down.
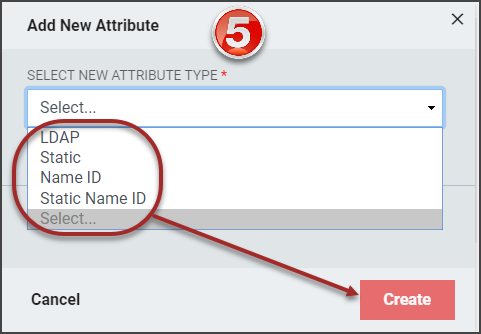
Based on the type of attribute being added, different menu options will display. Refer to the SAML Attributes section for details on completing the configuration for each attribute type.
Select to Permit or Deny the attribute mapping.
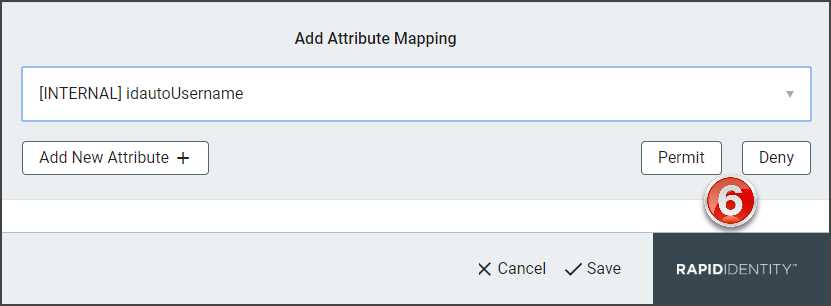
Click Add New Attribute+ to add additional SAML attributes. Repeat steps 2-8.
Click Save to add the attribute to the selected Federation Partner.
Click to Trigger Service Reload and Trigger Web Reload to activate the new attributes.