Add or Edit File Shares
File shares are repositories of storage for users to store files that can be accessed remotely. Administrators can set permissions by role or by attribute on the file share level, so administrators can set up repositories with access limited to certain users as well as provide a repository for files that everyone who authenticates into the system can access.
To add a new or edit an existing file share, click Settings and choose File Shares.

The resulting pop-out will redirect users to the File Shares page.

Edit an Existing File Share
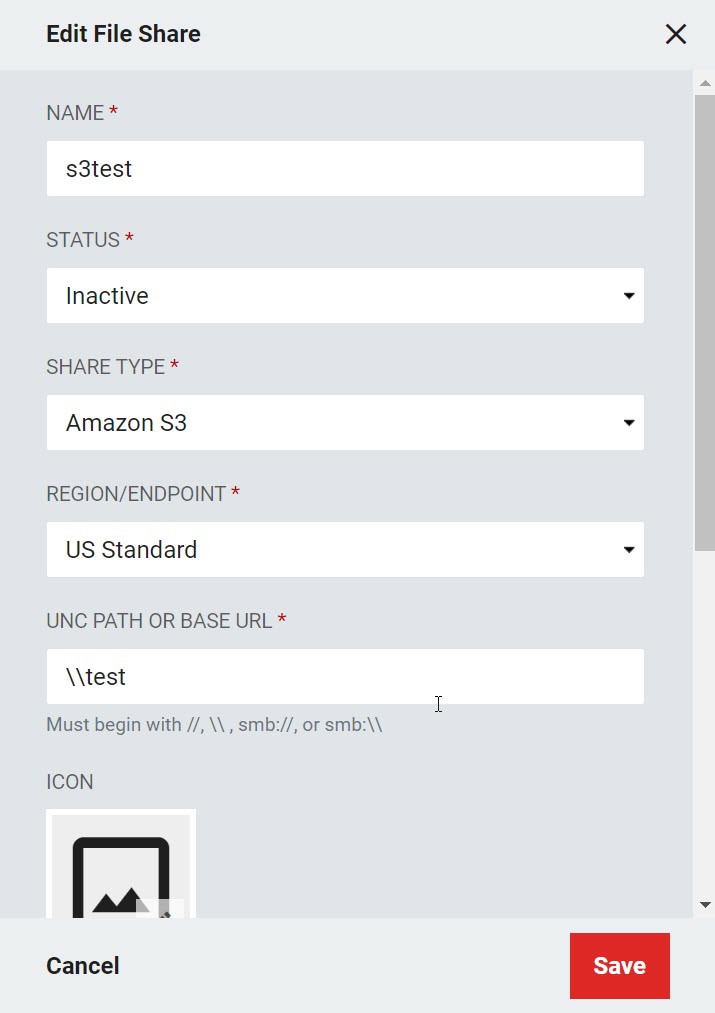
To edit an existing file share, hover over the Edit button to the right of the label.
 |
This opens a side menu that will provide Administrators the opportunity to edit the File Share's Name, Status, Share Type, Region/Endpoint, UNC Path or Base URL, Icon, Username or Access Key, and Access Control. Administrators can also view the File Share's ID and update the Password or Secret Key for the Username or Access Key.
 |
Adding a File Share
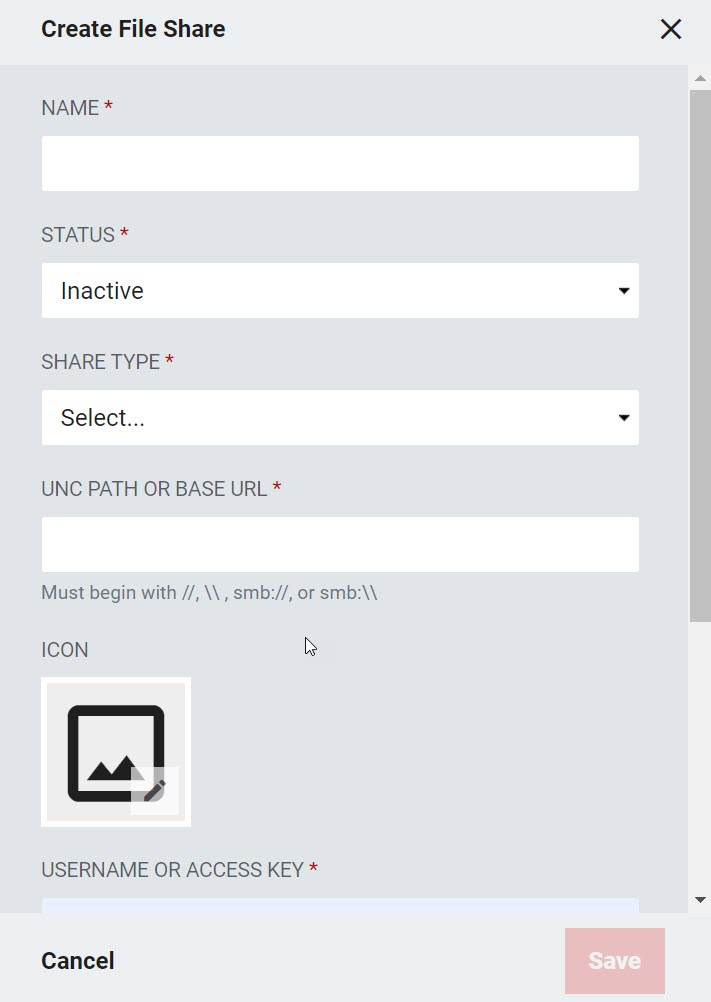
There are three types of file shares available to configure within RapidIdentity: Amazon S3, Windows Share, and WebDAV. The fields required will vary depending on the type chosen. To add a file share to RapidIdentity, click the Add File Share + button.
 |
Different file share services vary in price and configuration requirements. Choose the one that is most relevant to your network.
 |
Enter the information for the external file share as explained below in the right sidebar; when you are finished, click Save.
Note
Ensure that the Username/Access Key and Password/Secret Key are updated in this sidebar.
 |