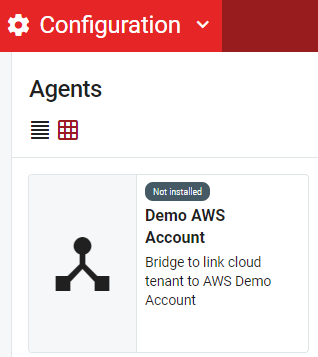
Identity Bridge
The Identity Bridge feature in RapidIdentity facilitates secure network connectivity from an IDaaS tenant to an on-premise service such as a database or a web server. To do this, you will need to set up Agents - pieces of software installed on an on-premise machine that communicate with the IDaaS infrastructure to host and manage one or more bridges.
Note
Each bridge facilitates communication from IDaaS to a single on-premise service. Agents may have multiple bridges.
Identity Bridge: Quick Start Guide
This guide will walk you through the process of creating a connection between RapidIdentity and your local resources using Identity Bridge.
Important
An Administrator assigned the "Tenant Admin" role in the RapidIdentity Portal is required to access Identity Bridge configuration options.
There are three main steps to set up a new bridge:
To install and run the Identity Bridge agent on a Windows server, you must have the following specifications available:
System Element | Requirement |
|---|---|
CPU | 1.4GHz |
Memory | 2GB |
HDD | 10GB |
Network | 10Mbps (Tested down to 1Mbps) |
OS | Windows Server 2012 or higher |
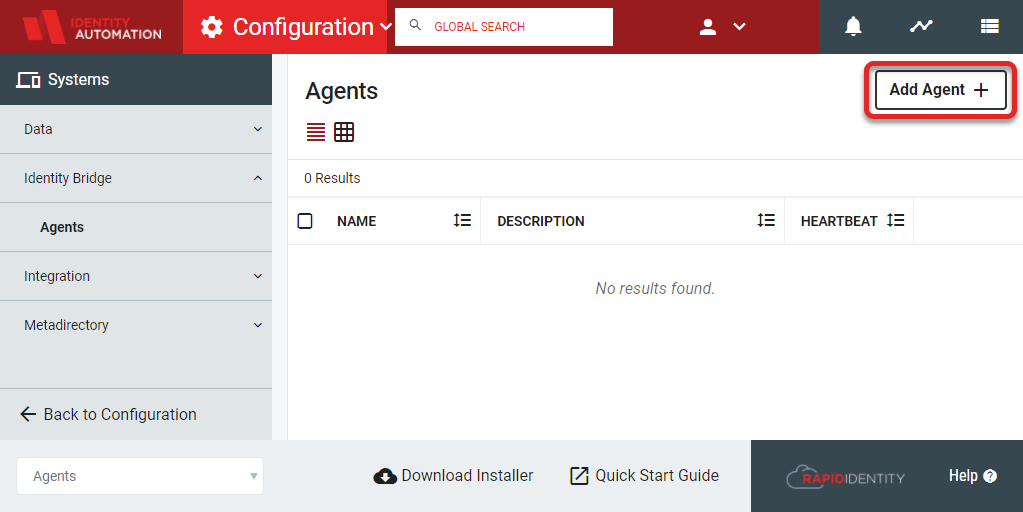
Configure the Identity Bridge Agent Settings in RapidIdentity
From the Configuration module, select Identity Bridge from the Systems menu.
Click Add Agent+ either in the workspace or the upper right-hand action button.
In the General Settings section, enter a Name and Description for the bridge.
Select Enable Proxy to allow the configuration of the internet proxy connections if required by the local system service to connect to the internet.
Click Save.
Copy the Registration Code that appears in the information box at the top of the General Settings screen.

Important
This code is required when installing the agent software.
Install the Identity Bridge Agent Service on the Local Server
Note
No inbound ports are required to be opened for the Identity Bridge agent installed on-premises. The only outbound port that needs to be allowed through firewalls for the agent is TCP 443.
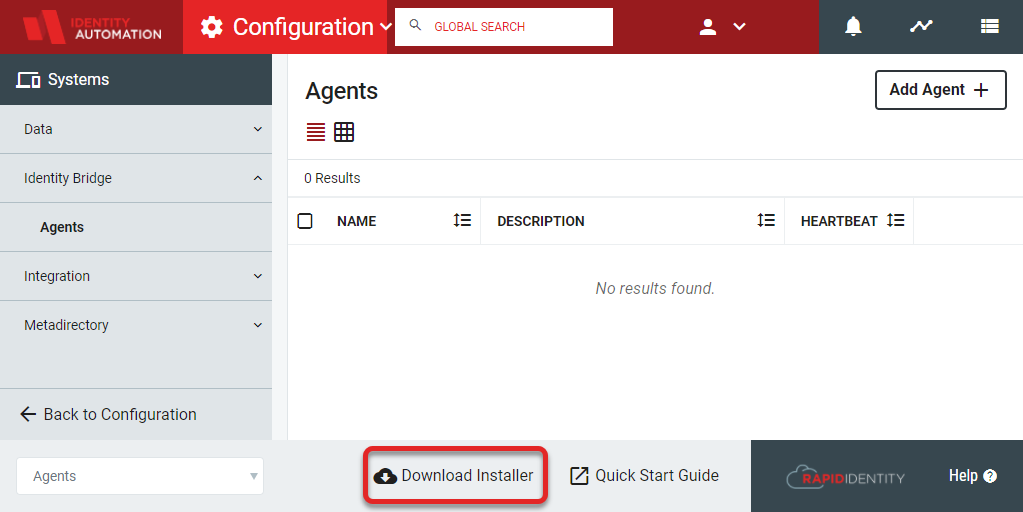
From the Configuration module, select Identity Bridge from the Systems menu.
Click Download Installer from the action buttons at the bottom of the screen to download the RapidIdentity Identity Bridge Agent to your local server.
Locate the download on the local server and run IdentityBridgeAgent.exe.
The Identity Bridge Agent Setup Wizard will launch.
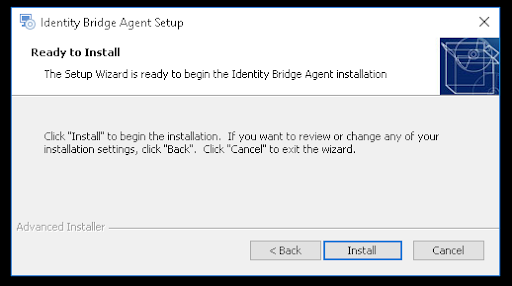
Click Install.
In Tenant Information, enter the Tenant URL and Registration Code. The Registration Code will match the code provided in Step 5 of the "Configure the Identity Bridge Agent Settings in RapidIdentity" section.
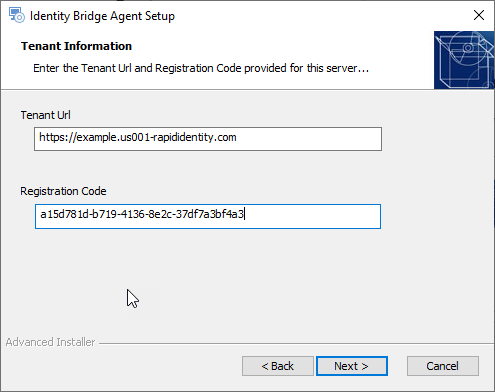
Click Next.
Click Finish.
Note
The connection should now be established with the RapidIdentity Identity Bridge Agent.
Return to the Identity Bridge section in the Configuration Module. The newly added Agent tile in the workspace will display the connection status.

If a "Heartbeat" status was returned, the connection is successful.
Add a Bridge in RapidIdentity to Provide Access to an On-premise Resource
From the Configuration module, select Identity Bridge from the Systems menu.
Click Details from the recently added agent tile.
In the Agent Details, scroll down to the Bridges section. After the Agent has been successfully installed, the option to Add Bridge is now available.
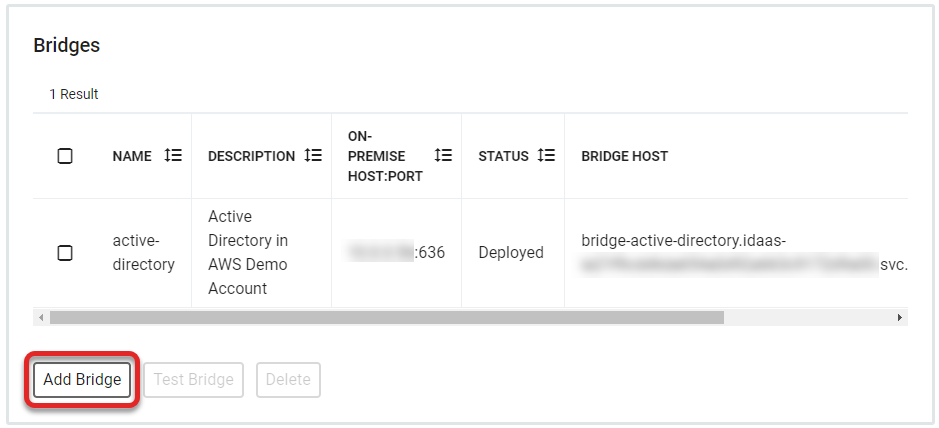
Click Add Bridge and enter the Name, On-Premise Host IP address, and On-Premise Port information in the Add Bridge details.

The On-Premise Host IP address and the On-Premise Port information are from the system on which the Agent is being installed. For example, if the service being bridged is a database that is accessible from the Agent server as "database.local" on "port 5432," then chose those values.
Click Save.
The ability to test or delete the bridge will become available after the bridge is successfully deployed. There are several available statuses:
Deploying: Initial status when the bridge is first saved
Deployed: The status after the bridge is successfully deployed
Destroying: The status while the bridge is being removed from the list
After the bridge has been successfully deployed, select the bridge from the Bridges list and clickTest Bridge.

The successfully created bridge will register the configuration information in the Test window.
Setting up a Windows File Share with Identity Bridge
Navigate to Configuration > Systems > Identity Bridge > Agents.
Select Add Agent.
Give the agent a Name and Save.
Click Download and save the file.
Run the Identity Bridge Agent Installer
IdentityBridgeAgent.exe.Enter the Tenant URL.
Copy and paste your Registration Code from the agent setup screen.
Click Next and then Setup.
Go back to the Identity Bridge configuration settings in RapidIdentity.
Select the Agent and select Details.
For each file server you will need to access:
Select Add Bridge.
Enter a name for the Bridge Name.
Enter the on-premise host/IP address of the full DNS name of the file server.
Enter the On-Premise port as 445.
Click Save. The bridge will initially display as Deploying.
If using DFS paths:
Create a bridge for the DNS name of the AD domain and port 445.
If the LanMan (short) name of the AD domain is different from the prefix of the full DNS name, also create a bridge using the LanMan (e.g. DNS name is my.example.com, but LanMan name is MYEXAMPLE).
Create bridges for any DFS namespace servers for which you don't already have a bridge for port 445.
Wait for all the bridge statuses to reach Deployed before proceeding to the next step.
Select the Files module and select Settings.
Select File Shares.
Click Add New File Share and select Windows File Share.
Choose a name and icon.
Change the file share from Inactive to Active.
For the UNC path, use the full DNS name of the file server or DFS root (usually the AD domain, but could also be a stand-alone DFS namespace).
Add the credentials for the file share using the userPrincipalName format if the user is an AD user.
Configure the Access Controls and click Save.
The share should now be listed under File Shares.