Create Field Mapping
Field Mapping is the last configuration step that needs to happen to a new application before the next process phase. From the Record Mappings screen, scroll to the bottom and click Add Field Mapping.
 |
In General Settings, map Metaverse records from file records. Populate the three following options:
Target Field Name - Select the field as defined in Field Definitions for the target record - in this example, we're mapping
employeeId.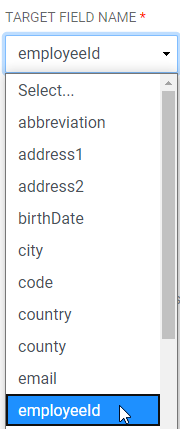
Value Type - Choose from
FIELD,STATIC, andEXPRESSION. For this particular mapping,FIELDis the appropriate choice.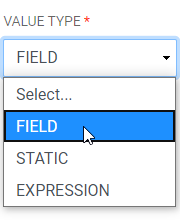
Value - Set the value from the Field Definitions that correlates with the Target Field Name chosen. In this case, the chosen value is
id.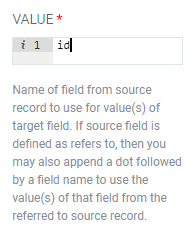
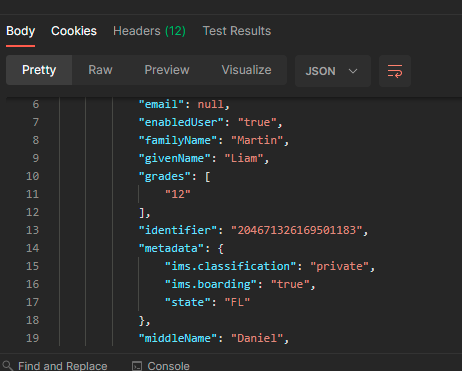
Note
For OneRoster REST Consumers only , the required format for the metadata field is an array of one or more key-value pairs that are delimited by colon (:) characters.
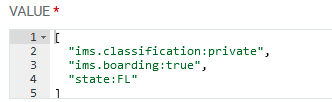
This results in a JSON response for the OneRoster API.
In Events, select when to apply the field mapping.
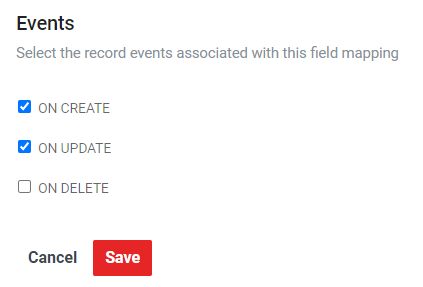
On Create - When a source record is found with no matching target
On Update - When a source record is found that has a matching target
On Delete - When a source record cannot be found for a target
Click Save.
The Field Mapping that was automatically created for
recordKeywill need to be updated. Assign the correct value of the source column for this field in order to maintain application functionality.Continue adding Field Mappings for the remaining columns and Field Definitions until all columns have been mapped to Metaverse fields.
Once all mappings have been configured, run the Job for the application.