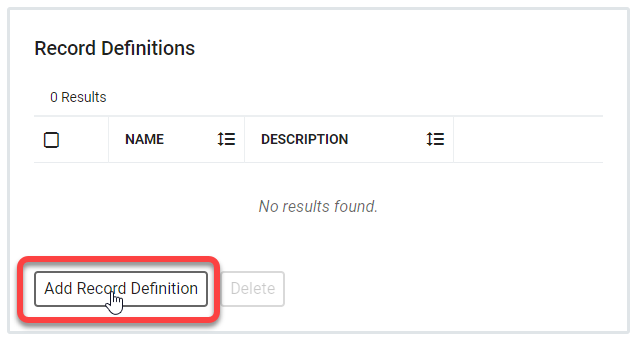
Create Record Definitions
New, custom applications will need their Record Definitions defined in order to begin mapping the information flow through RapidIdentity Studio.
Click Add Record Definition from the Application's configuration menu.
General Settings
Give the Record Definition a name and an optional description.
Note
Note the prefix that was defined during initial setup. The name used here will be relevant when Record Mappings are defined.

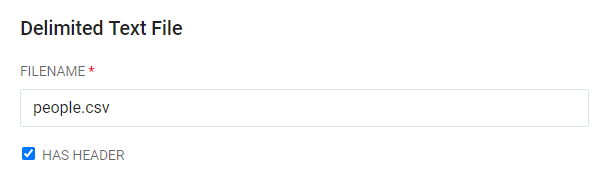
Delimited Text File
When importing files with data, first you need to define some details about it for the system to utilize it properly. In this example, we are using people.csv with columns and a header row.
First, provide the filename and whether the expected file has a header row. If there is a header row in the file, you can safely skip to step 3. If not, continue to step 2 to define headers for each column.
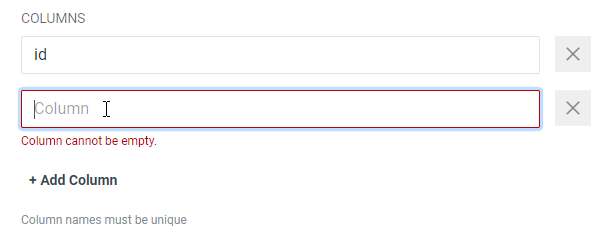
Consult the file being imported and click Add Column to define each column in the file. These are the column names that will describe the data within the column and must be accurate.
Note
Column Names must be unique within the file.
If there is a header row already included in the file, this list is not required.
If these fields are populated, the list must be in the exact order of the columns in the file.
Once all of the columns have been added, include other configurations and Record Filters as necessary and click Save.
Next you will need to create Field Definitions.