Created Roles List
When selecting the roles to display from the left menu items, My Roles, Other Roles, or Team Roles, the workspace will display all available roles.
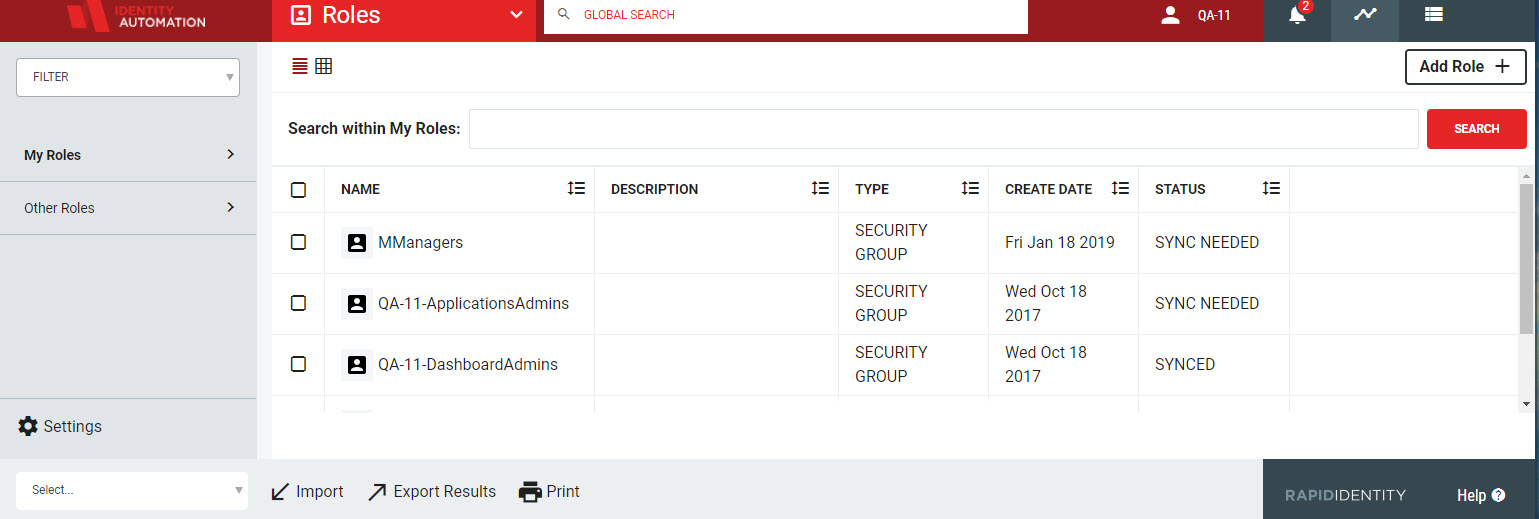 |
The workspace may initially be empty if no roles have been created.
If a user is listed as a role manager by either the Role Owner or another Role Membership Manager, then the workspace will be populated with available roles on the first login.
All workspace content columns are sortable. To sort, click on the column header and adjust accordingly.
Column | Description | |
|---|---|---|
Checkbox Selector | The checkboxes are used to select one or multiple rows. Records can be selected by clicking on the checkbox, by clicking anywhere on the row. Select all entries by clicking the top checkbox in the header row. Select multiple rows by selecting multiple checkboxes. | |
Name | The designated role name | |
Description | A short text description of the role | |
Type | The Type of the role | |
Create Date | The time stamp of when the role was created | |
Status | Describes the current sync status of the role; if the status is Sync Needed, select the roles to be synced and click the Sync icon in the next column.
|

The action bar at the bottom of the workspace allows for a user to perform actions on the selected roles. Available action buttons are dependent upon the users permissions in the system.
 |